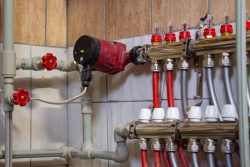
How To Test A Central Heating Pump
How To Test A Central Heating Pump
A central heating pump is a crucial component in any heating system. It is responsible for circulating hot water around the radiators in your home, keeping your space warm and comfortable. In the event of a malfunction, it’s important to test your central heating pump to identify the cause of the issue. In this blog post, we will go over the steps on how to test a central heating pump.
Step 1: Turn Off the Power Supply
Before testing your central heating pump, make sure to turn off the power supply to your heating system. This is important as it reduces the risk of electric shock and damage to the pump during the testing process. Locate the power switch or circuit breaker that controls your heating system and turn it off.
Step 2: Accessing the Central Heating Pump
The next step is to locate the central heating pump. In most cases, the pump is located near the boiler, but this can vary depending on the design of the heating system. Turn off the isolation valves connected to the pump to prevent any water from spilling during testing.
Once you’ve located the pump, carefully remove the cover to expose the internal components of the pump. This is where you will be testing the pump’s functionality.
Step 3: Checking the Impeller
The impeller is the central heating pump’s rotating component responsible for forcing water through the heating system. To test the impeller’s functionality, use a small, flat-head screwdriver to try to turn the impeller. This test checks for any obstruction or mechanical damage that may have occurred.
If the impeller turns smoothly, this indicates that there’s no physical damage to the pump. If the impeller feels clogged, it may indicate something such as dirt or debris stuck in the pump, giving rise to the problem.
Step 4: Testing Electrical Connections
The next step in the process is to check whether the pump is receiving an electrical current. To do this, use a voltage tester or multimeter and hold the leads against the electrical connections on the pump. If there’s no electrical current, it may be an indication of an electrical fault. However, ensure that the pump shut off from the power supply is still well instituted, and it should be checked to ensure it is still functioning correctly.
The electrical connections, as well as the wirings, should be checked thoroughly to identify any breaks or loose connections that may be giving rise to the problem. More so, the wiring must be double-checked to ensure that it is correctly connected to the pump’s correct terminals.
Step 5: Check the Capacitor
The job of a capacitor is to generate a high voltage to start the motor, which may become a perfect socket for energy storage in the absence of normal voltage. If the capacitor is unable to perform its duties correctly, a fault may arise in the system as the motor may lay idle or respond late. The whirring sound emitted by the pump speakers may reduce or become non-existent when the capacitor becomes faulty.
To check whether the capacitor is faulty, use a multimeter’s capacitance setting and hold the leads against the capacitor terminals. If the capacitance readings are below the average rating, that indicates the capacitor is faulty.
Step 6: Inspecting the Bearings
The pump bearings are essential to its functionality, as they facilitate its smooth rotation. These bearings are usually susceptible to wearing off or damage over a long period of time, and this may cause friction on the impeller, leading to an interruption in rotation and mechanical damage. If the system’s temperature controllers are reading normal, but the radiators don’t become hot, it may indicate a fault with the bearings.
The bearings should be adequately inspected and lubricated to determine any problem that may have arisen. If the bearings are worn or corroded, they need replacement.
Step 7: Reassembling and Testing the Pump
Once you’ve checked and identified any faults or problems with the central heating pump’s components, it’s time to reassemble the pump and conduct a final test. Reassemble the pump’s case and ensure that all isolation valves are open again to allow the system to pump water again.
Turn the power supply back on and turn up the thermostat to allow the heating system to operate. Observe the system and see if the central heating pump resumes its effective operation. If the pump resumes its smooth operation, then the test is successful, but if not, you would need to take more drastic measures.
Final Thoughts
In conclusion, testing a central heating pump to identify faults is essential to maintaining an efficient and reliable heating system. Following the steps discussed above can help you identify any problems that the central heating pump may have and help you take decisive action to resolve any underlying issues. Always remember to turn off the heating pump from the power supply before starting the test and call in a professional if you’re not confident in conducting the test yourself.
And if, after performing a test, you need service completed for your central heating pump, or a new one all together, reach out and contact us today!
Categorised in: Irrigation

